As an Amazon Associate I earn from qualifying purchases.
Welcome, fellow smoothie enthusiasts and kitchen appliance wizards! Today, we have an essential guide for all those struggling with the age-old quibble – how to remove a Ninja blender from its durable base.
While some might think it’s a simple task, we have often found ourselves in a perplexing situation where removing the blender seems more like fighting a ninja than using one.
But fear not, dear readers, for we have diligently researched and outlined a step-by-step process to effortlessly separate your beloved blender from its sturdy base.
So, prepare to bid adieu to any struggles you’ve endured in the past, as we delve into the realm of blender liberation mastery. Say goodbye to frustration and hello to a seamless blending experience!
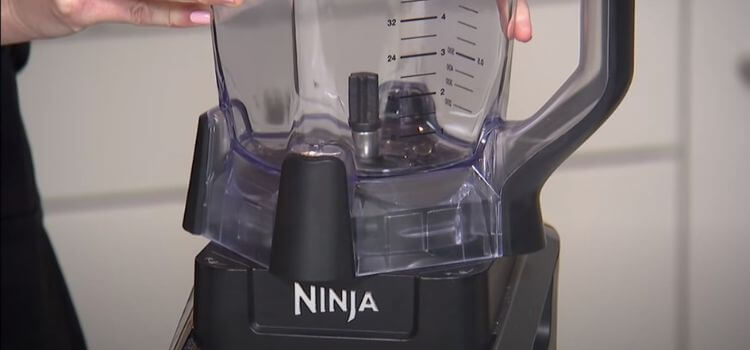
When it comes to kitchen appliances, Ninja blenders have gained immense popularity for their superior blending performance.
However, there may arise instances when you need to detach the blender from its base, be it for cleaning, maintenance, or storage purposes.
In this blog post, we will guide you through the step-by-step process of safely removing your Ninja Blender from its base.
1. Gather the tools:
Before attempting to remove your Ninja Blender from its base, you need to ensure you have the necessary tools at hand.
Gather a clean towel, a screwdriver (specific type may vary depending on the model), and rubber gloves. The towel will provide a safe surface to work on and prevent any scratches or damages, while the screwdriver will be used to release the blender from its base.
The rubber gloves will offer additional grip and keep your hands protected.
2. Unplug the blender:
Always prioritize safety and unplug your Ninja Blender from the power source before attempting to remove it from the base.
This crucial step will eliminate any risk of electrical shock or damage.
3. Position the blender on the towel:
Place the clean towel on a stable countertop or surface and position your blender upside down on it.
This will provide stability and prevent the blender from slipping during the removal process.
4. Locate the screws and loosen them:
Carefully inspect the base of your Ninja Blender to locate the screws that secure it to the base.
Using the appropriate screwdriver, gently loosen these screws by turning them counterclockwise. Avoid using excessive pressure or force, as this may cause damage to the blender or strip the screws.
5. Lift and detach the blender:
Once you have fully loosened the screws, carefully lift the blender upwards while holding onto the handle or the blender jar.
Ensure a firm grip using the rubber gloves if necessary. Lift slowly and steadily to detach the blender from the base. Once detached, place the blender aside on a clean and safe surface.
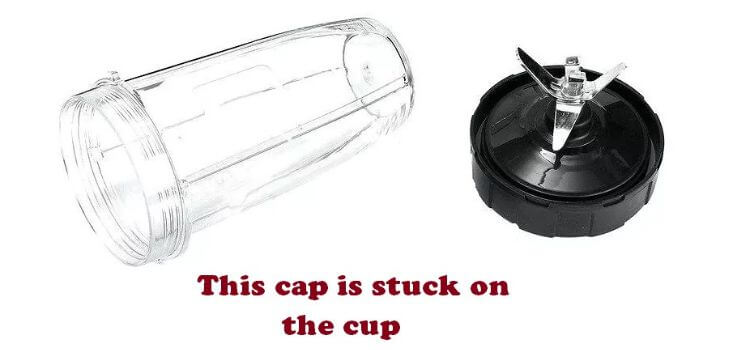
6. Remove the pitcher or jar:
To remove the pitcher or jar from the Ninja Blender’s base, you will need to locate the locking mechanism. Most Ninja blenders have a simple twist-lock mechanism that secures the pitcher or jar to the base. Start by ensuring that the blender is turned off and unplugged for safety.
Next, locate the locking tabs on the base of the blender. These tabs are usually located on either side of the base, towards the front. Gently grip the pitcher or jar with one hand and use your other hand to push down on the locking tabs. As you push down, twist the pitcher or jar counterclockwise to unlock it from the base.
It’s important to note that some Ninja blenders may have different variations of locking mechanisms. If you’re unsure about how to unlock the pitcher or jar from the base, consult the user manual or reach out to the manufacturer for assistance.
7. Locate the release tabs or buttons:
Removing your Ninja Blender from its base may seem like a simple task, but it’s important to follow the correct steps to avoid any potential damage to either the blender or yourself.
One crucial step in this process is locating the release tabs or buttons on the blender’s base.
The release tabs or buttons can typically be found on the sides of the blender’s base. They are designed to securely hold the blender in place during operation but can be easily accessed when it comes time to remove the blender. These tabs or buttons may be labeled with arrows or icons that indicate their purpose. For example, you might see a picture of a blender with an arrow pointing upwards or a symbol resembling a lock being opened.
To remove the Ninja Blender from its base, simply press or slide the release tabs or buttons in the appropriate direction. This action will disengage the locking mechanism, allowing you to lift the blender jar off the base. It is important to apply gentle pressure and avoid forcing the tabs or buttons. If you encounter any resistance, double-check that you are pressing or sliding them correctly.
Always exercise caution while handling the blender during this process, as the blades may still be sharp. Additionally, take care not to spill any contents that may still be in the blender jar. It may be helpful to empty the contents of the jar beforehand or tilt it slowly and steadily to avoid any spills
8. Press or unlock the release mechanism:

When it comes to detaching your Ninja Blender from its base, it is essential to be familiar with the release mechanism. The release mechanism is designed to ensure a secure attachment between the blender and the base, but it can sometimes make detaching a bit challenging.
To effectively remove the Ninja Blender from the base, it is important to understand how to press or unlock the release mechanism properly.
To begin, locate the release mechanism on your Ninja Blender. This could be a lever or a button, depending on the specific model you have.
Once you’ve identified the release mechanism, make sure your blender is turned off and unplugged before proceeding to remove it from the base.
Next, apply steady pressure on the release mechanism. It is crucial to use the appropriate amount of force without exerting excessive pressure.
Gently press or unlock the release mechanism, following the specific instructions provided in your blender’s user manual. Avoid using excessive force, as this can lead to damage to both the blender and the base.
With a controlled and steady motion, detach the blender from the base. Keep in mind that different Ninja Blender models may have slightly different release mechanisms, so it is important to refer to the user manual for specific instructions.
If you are having difficulty detaching the blender from the base, it may be helpful to rock the blender gently back and forth while applying pressure to the release mechanism.
9. Clean the base and blender parts:
One essential step in removing a Ninja blender from its base is to ensure that both the base and blender parts are clean.
Taking advantage of this opportunity to clean these components thoroughly not only ensures proper functionality but also promotes hygiene in your kitchen.
Start by unplugging the blender from the power source to prevent accidents. Next, disassemble the blender by removing the pitcher or cup from the base.
Using warm soapy water and a non-abrasive cloth, gently clean the base, paying close attention to any build-up or residue. Similarly, clean the pitcher or cup, the lid, and the blades, making sure to wash away any leftover food particles.
Once all the parts are clean, allow them to air dry completely before reassembling the blender.
10.Check the safety lock:
Another crucial aspect to consider when removing a Ninja blender from its base is to ensure that the safety lock is released.
This safety feature is designed to prevent the blender from accidentally turning on while not properly assembled. To check the safety lock, carefully examine the base and the pitcher or cup for any visible lock indicators.
Typically, there will be arrows or symbols that show how the pitcher or cup should align with the base for it to be securely attached.
If the lock is engaged, gently twist or push the pitcher or cup until it clicks into place and the lock indicators are aligned.
Conclusion
Safely removing a Ninja Blender from its base is a straightforward process that requires patience and caution.
By following the steps outlined in this article, you can easily detach the blender from its base without causing any damage. Once the disassembling is complete, it is crucial to reassemble the blender correctly, ensuring that all parts are securely attached.
Finally, before using the blender again, it is important to test it to ensure proper functionality.
By adhering to these guidelines, you can confidently remove and reassemble your Ninja Blender, allowing for a smooth blending experience every time.
Amazon and the Amazon logo are trademarks of Amazon.com, Inc, or its affiliates.
Leave a Reply