As an Amazon Associate I earn from qualifying purchases.
The Ninja Blender has undeniably taken the culinary world by storm with its unrivaled popularity and unmatched versatility in the kitchen.
From whipping up smoothies to crushing ice with ease, this powerful blender has become a staple appliance for many home cooks and professional chefs alike.
In this blog post, we will dive into the realm of frozen desserts and explore the fascinating process of making ice cream using a Ninja Blender. Prepare to turn your kitchen into a homemade ice cream parlor as we uncover the secrets and techniques to create irresistibly creamy and delicious frozen treats with the help of this exceptional kitchen companion.
So, grab your Ninja Blender, and let’s embark on a frosty adventure that is sure to delight your taste buds!
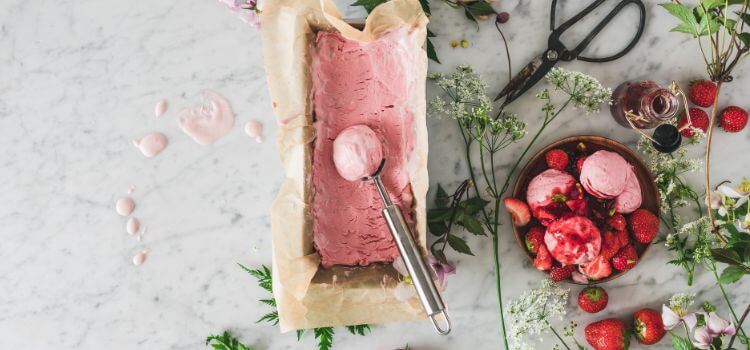
When it comes to enjoying cold and creamy treats, nothing beats homemade ice cream. Not only do you have complete control over the ingredients, but you can also customize your flavors to suit your taste buds.
Making ice cream in a Ninja Blender has its own set of advantages that make this process quick and convenient.
Firstly, homemade ice cream allows you to have full control over what goes into your dessert. Unlike store-bought options, you can choose fresh and high-quality ingredients, ensuring a healthier and more delicious treat.
By using a Ninja Blender, you can easily blend together your desired combination of fruits, nuts, chocolates, or any other flavorings without worrying about hidden additives or preservatives.
This makes homemade ice cream a perfect choice for those with dietary restrictions or allergies.
In addition to controlling the ingredients, making ice cream in a Ninja Blender offers the advantage of customization. You can experiment with various flavor combinations, creating unique and exciting tastes that are simply not available at your local grocery store.
Whether you prefer classic flavors like vanilla and chocolate or more adventurous ones like matcha or lavender, a Ninja Blender can effortlessly whip up your dream ice cream. The possibilities are endless!
Moreover, a Ninja Blender makes the ice cream-making process quick and convenient. With its powerful motor and sharp blades, this blender can expertly blend all the ingredients together into a smooth and creamy texture in seconds.
No more standing by a noisy ice cream machine or dealing with complicated churning processes. Simply add your ingredients to the blender, give it a whirl, and you’ll have homemade ice cream ready to enjoy in no time.
Furthermore, a Ninja Blender offers versatility beyond just making ice cream. It can be used for a variety of other kitchen tasks as well. From blending smoothies and soups to creating delicious sauces and dips, this appliance has become an essential tool in any kitchen.
Its multi-functional capabilities make it a valuable investment for any ice cream lover.
Preparing the Ninja Blender:
The first step in making ice cream in a Ninja Blender is to ensure that the blender is properly set up and ready for use. Start by checking that all the necessary parts are intact and in good condition.
This includes the pitcher, blades, and lid of the blender. Make sure that everything is securely in place and there are no loose or damaged parts.
Next, it is crucial to thoroughly clean the blender before using it to make ice cream. This will help ensure that there are no lingering flavors or odors from previous blends.
Start by disassembling the blender and washing each component with warm soapy water. Pay special attention to the pitcher and blades as these are the parts that will come into direct contact with the ice cream ingredients.
Rinse the parts thoroughly to remove any soap residue, and then allow them to air dry completely before reassembling.
Once the blender is clean and dry, it is ready to be used for making ice cream. Before adding any ingredients, it is a good idea to run the blender for a few seconds to ensure that everything is working properly.
This will also help eliminate any remaining water or moisture that may have been missed during the cleaning process. Simply turn the blender on and let it run for a couple of seconds before turning it off and proceeding with the ice cream-making process.
To ensure the best results when making ice cream in a Ninja Blender, it is important to follow a few additional tips.
Firstly, make sure that the ingredients are properly chilled before blending them. This will help prevent the ice cream mixture from melting too quickly during the blending process.
Additionally, it is recommended to use frozen fruit or ice cubes to help keep the mixture cold and thick. Lastly, avoid overfilling the pitcher as this may prevent the ingredients from blending evenly and smoothly.
Step-by-step process of making ice cream:

As summer approaches, there’s nothing quite as satisfying and refreshing as a creamy scoop of homemade ice cream. But did you know that you can make ice cream right in your very own kitchen using a Ninja Blender? In this blog post, we will guide you through the step-by-step process of making delicious ice cream using this versatile kitchen appliance.
Step 1: Gather Your Ingredients
Before you begin, ensure you have all the necessary ingredients on hand. Traditional ice cream usually requires heavy cream, whole milk, sugar, and flavorings such as vanilla extract.
However, the beauty of making ice cream in a Ninja Blender is that you can adapt the recipe to suit your preferences. Want a dairy-free option? Substitute the heavy cream and milk with coconut milk or almond milk.
Craving a different taste? Experiment with different flavorings such as cocoa powder, fruit puree, or even coffee.
Step 2: Add the Ingredients to Your Blender
Once you have your desired ingredients, pour them into the Ninja Blender. Start with the liquid components like milk, cream, or alternative milk, and then add the sugar and flavorings.
It’s important to add the ingredients in the order specified by the recipe to ensure proper blending. This will help achieve a smooth and creamy consistency
.Step 3: Blend Until Creamy
Once all the ingredients are added, secure the lid of your Ninja Blender tightly. Start with a low-speed setting and gradually increase the speed until the mixture is fully blended and smooth.
The powerful blades of the Ninja Blender will effortlessly incorporate all the ingredients, resulting in a creamy base for your ice cream.
Step 4: Achieve the Desired Consistency
To achieve the desired ice cream consistency, you may need to put the blended mixture in the freezer for a period of time. This step allows the ice cream to firm up and develop a smooth texture.
Be sure to check the recipe for specific instructions on how long to freeze the mixture to reach the desired consistency. You can also consider adding mix-ins such as crushed cookies, chopped nuts, or swirls of caramel during this freezing process to enhance the flavor and texture of your ice cream.
Step 5: Serve and Enjoy!
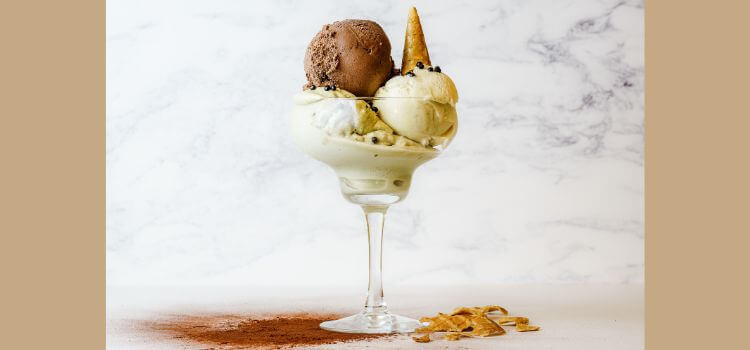
After the ice cream has reached the desired consistency, it’s time to serve and enjoy the fruits of your labor. Scoop the ice cream into bowls or cones and top it with your favorite toppings.
Troubleshooting common issues:
Making homemade ice cream with a Ninja Blender can be a delightful experience, but sometimes we encounter a few hiccups along the way.
In this section, we will address some common problems that may occur during the ice cream-making process and provide you with practical solutions and tips to overcome these challenges with your Ninja Blender.
Issue 1: Ice Cream Not Thickening as Expected
Sometimes, you may find that your ice cream mixture is not thickening to the desired consistency. T
his can be due to several reasons, such as using too much liquid or not freezing the mixture prior to blending. To overcome this issue, ensure that you follow the recipe proportions precisely and adjust the liquid content accordingly.
Additionally, make sure to freeze your ice cream base for a few hours before blending to improve the thickness. Adding a small amount of cornstarch or guar gum can also enhance the texture and help thicken the ice cream.
Issue 2: Lumpy Texture
If you notice lumps or chunks in your ice cream, it could be due to insufficient blending time or not allowing the ice cream mixture to chill thoroughly before blending.
To avoid this problem, blend the mixture for an extra minute or until it becomes smooth and creamy. Moreover, ensure that your individual ingredients, such as fruits or chocolates, are chopped into smaller pieces before adding them to the blender. This will help achieve a smoother texture throughout.
Issue 3: Overheating the Blender Motor
When making ice cream using a Ninja Blender, it’s important to keep an eye on the blender’s motor temperature. Continuous blending for an extended period can cause the motor to overheat, resulting in poor performance.
To prevent this, it is recommended to blend the ice cream mixture in intervals, allowing the blender to rest for a few minutes between each blending session.
Additionally, ensure that the lid is secured tightly, preventing the mixture from leaking and causing potential damage to the motor.
Issue 4: Ice Crystals in the Ice Cream
The formation of ice crystals is a common issue when making homemade ice cream.To minimize this problem, make sure to freeze your ice cream maker bowl or container before starting the process.
Additionally, cover your ice cream mixture with a plastic wrap tightly, directly touching the surface to prevent air exposure.
This will help maintain a consistent temperature and reduce the chances of ice crystals forming in your ice cream.
Tips for achieving the perfect texture:

When it comes to making homemade ice cream in a Ninja Blender, achieving the perfect texture is crucial for a satisfying dessert experience.
By following a few tips and tricks, you can create a creamy and smooth ice cream right in the comfort of your own kitchen.
One vital factor in achieving the desired texture is the blending time. It is recommended to blend the mixture for a longer duration to ensure all the ingredients are well incorporated.
The Ninja Blender’s powerful motor can handle extended blending without compromising the texture. Aim for a blending time of at least 3-4 minutes to allow the ice cream base to become smooth and creamy.
Another essential tip is to ensure the ingredients are properly chilled before blending. Cold ingredients not only help prevent ice crystals from forming but also allow for a creamier texture.
It is suggested to refrigerate all the ingredients beforehand, including the ice cream base, fruits, and any other mix-ins you may want to add. This will help maintain the desired consistency throughout the blending process.
Furthermore, controlling the speed and pulsing techniques are key factors in achieving the ideal ice cream texture. Start by blending the liquid base on a low speed and gradually increase it to medium-high for a thorough mix.
For incorporating mix-ins like fruits or nuts, utilize the pulsing function to prevent over-blending and maintain their texture. Remember, it’s important to strike a balance between blending thoroughly and preserving the integrity of the added ingredients.
Additionally, paying attention to the quality of the ingredients used can greatly influence the texture of your homemade ice cream. Opt for high-quality dairy products like full-fat milk, cream, and premium vanilla extract.
Using these ingredients will contribute to a richer and creamier ice cream. Additionally, choosing ripe and flavorful fruits or high-quality chocolate and nuts for mix-ins will elevate the overall texture and taste.
Lastly, storing the ice cream properly after blending is crucial in maintaining the desired texture. Transfer the freshly made ice cream into an airtight container and place it in the freezer.
Ensure that the container seals tightly to prevent ice crystals from forming. To maintain the creamy texture, it is recommended to stir the ice cream once or twice within the first few hours of freezing.
This helps break up any ice crystals that may have formed and results in a smoother final product.
Storing Homemade Ice Cream:
Homemade ice cream is a delightful treat that can be made effortlessly using a Ninja Blender. Once you have successfully churned your ice cream to perfection, it is crucial to store it properly to maintain its freshness and prevent dreaded freezer burn.
By following a few simple guidelines, you can ensure that your homemade ice cream retains its creamy texture and delightful taste.
To begin with, it is advisable to transfer your freshly made ice cream into an airtight container.
Freezer-safe glass or plastic containers with lids work best for this purpose. By sealing the ice cream tightly, you can prevent any unwanted flavors or odors from permeating the batch.
Once the ice cream is safely stored, it is essential to place it at the back of your freezer, where it is less susceptible to temperature fluctuations.
By avoiding the freezer door, you can minimize exposure to warm air each time the door is opened, which could result in freezer burn.
Preventing freezer burn is crucial to maintaining the quality of your homemade ice cream. This undesirable condition occurs when moisture is lost from the ice cream, causing it to develop a grainy texture and, sometimes, an unpleasant taste.
To prevent this, it is recommended to layer a sheet of plastic wrap directly on the surface of the ice cream before sealing the container. This extra barrier will help preserve moisture and minimize the risk of freezer burn.
Moreover, to ensure the longevity of your homemade ice cream, it is advisable to consume it within three months of freezing.
While ice cream can technically remain safe to eat for longer, its quality might gradually diminish over time. To keep track of the storage duration, consider labeling the container with the date it was made.
Conclusion:
Learning how to make ice cream in a Ninja Blender opens up a world of endless possibilities for creating delicious frozen treats at home.
Through this blog article, we have explored the various creative ways to serve and enjoy homemade ice cream made with this versatile appliance.
We have emphasized the importance of presentation and how it can enhance the overall ice cream experience. By paying attention to details and considering different toppings or garnishes, one can transform a simple scoop of ice cream into a visually stunning masterpiece.
Whether it’s a drizzle of chocolate syrup, a sprinkle of crushed nuts, or a dollop of whipped cream, the possibilities for garnishing are limitless.
Additionally, we have highlighted the significance of experimenting with different flavor combinations, textures, and even serving vessels, like waffle cones or bowls made from cookie dough.
As we conclude this article, it is essential to note that the true joy of serving and enjoying ice cream lies in the creativity and personalization that comes with it.
By utilizing a Ninja Blender to create homemade ice cream, individuals have the power to tailor their frozen creations to suit their tastes and preferences.
So, with your Ninja Blender in hand, let your imagination run wild, explore new flavor profiles, and experiment with unique serving techniques.
Get ready to delight your family and friends with the ultimate homemade ice cream experience that leaves lasting memories.
Amazon and the Amazon logo are trademarks of Amazon.com, Inc, or its affiliates.
Leave a Reply