• Skip to primary navigation
  • Skip to main content
  • Skip to primary sidebar

Kitchen & Dinning

  • Home
  • About Us
  • Contact Us
  • Privacy Policy
  • Terms of Use

Ninja Blender

Why is my Ninja Blender Blinking Red?

September 2, 2023 by sufian Leave a Comment

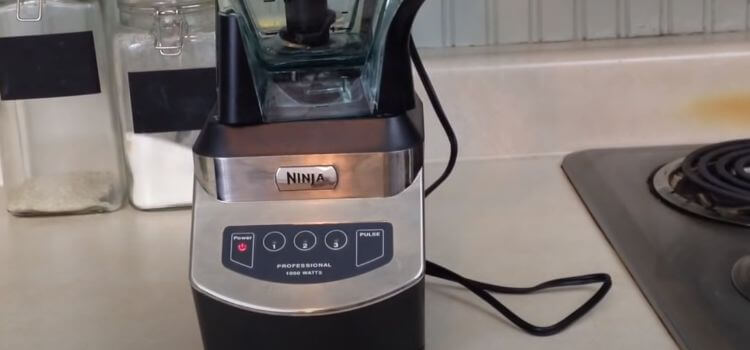
Have you ever experienced the frustration of your Ninja Blender’s red light blinking? Well, you’re not alone. Many Ninja Blender users have encountered this perplexing issue, wondering what it means and how to resolve it. 

In this blog post, we will delve into the depths of the blinking red light mystery, shedding light on the common reasons behind it and the importance of identifying and resolving the issue promptly. 

So, if you’re curious about why your Ninja Blender is sending out distress signals, keep reading to find out more.

Possible Cause 1: Blender overload and overheating

Why is my Ninja Blender Blinking Red

When you notice that your Ninja Blender is blinking red, it is often an indication of an overload or overheating issue. Excessive blending or prolonged use of the blender can cause the motor to overheat, triggering the blinking red light as a safety measure. 

This is a common occurrence as many users tend to push their blenders to their limits. However, it is important to understand the consequences of this behavior and take the necessary steps to resolve the issue.

Steps to resolve the issue and prevent future overload

To address this problem, the first step you should take is to unplug the blender and let it cool for a while. Overheating can damage the motor and other internal components, so allowing it to cool down is crucial.

Once the blender has cooled down, check for any obstructions or blockages in the blender jar or blade assembly. Clearing any debris or excess ingredients can help reduce the strain on the motor and prevent overload in the future.

Additionally, take note of the volume of ingredients you are blending. Overfilling the blender can cause the motor to work harder, leading to overheating. 

Be mindful of the maximum capacity recommended by the manufacturer and avoid exceeding it. If you regularly blend large quantities of ingredients, consider doing it in smaller batches to give the motor some rest in between.

Regular maintenance is also essential in preventing overload and overheating issues. Keep the blender clean and free from any residue that may impede proper motor function. 

It is recommended to clean it thoroughly after each use, ensuring that no food particles or liquid is left behind. Regularly inspect the seal on the blender jar to ensure it is intact and properly sealed. 

Any leaks or damages can cause the motor to work harder than necessary, leading to overheating.

Possible Cause 2: Incorrect assembly and lid positioning

When it comes to using a Ninja Blender, it is essential to ensure proper assembly and lid positioning. Many users may find themselves facing the frustrating issue of a blinking red light on their blender. 

This blinking red light is often an indication of improper assembly or lid placement, causing the blender to malfunction. In this blog section, we will highlight how improper assembly or lid positioning can lead to the blinking red light and provide simple instructions on correctly assembling and securing the blender.

Improper assembly can occur when the user fails to align the pitcher properly with the base. This misalignment prevents a proper connection between the pitcher and the base, resulting in the blender not being able to function correctly. 

To resolve this issue, carefully align the pitcher’s tabs with the notches on the base. Gently rotate the pitcher in place until it clicks into position. Double-check to ensure a snug fit between the pitcher and the base.

Another common mistake is the incorrect placement of the lid. The blinking red light can indicate that the lid is not securely placed, leading to the blender not starting. 

To address this issue, make sure the lid is securely locked in place before using the blender. Confirm that the lid is properly aligned with the pitcher and that the arrows on the lid and pitcher are aligned. 

Press down firmly until you hear a click to ensure the lid is locked in place and ready for use.

Additionally, it is crucial to check the positioning of the lid’s vent. The vent must be properly aligned with the spout located on the lid for the blender to operate smoothly. 

If the blinking red light persists, inspect the vent carefully. Ensure there is no obstruction or residue blocking the vent, as this can impact the blender’s functionality. Clean the vent if necessary to maintain optimal performance.

To avoid any potential issues with the blender, it is recommended to refer to the user manual provided by Ninja. The manual contains detailed instructions on how to assemble and operate the blender correctly. 

Following these instructions will not only prevent the blinking of red light but also ensure the longevity and efficiency of your blender.

Possible Cause 3: Motor malfunction or jammed blade

When it comes to the Ninja Blender blinking red, one possible cause could be a motor malfunction or a jammed blade. The motor is the heart of any blender, and if it starts malfunctioning, it can trigger a red light. 

Additionally, a blade that is jammed or not spinning properly can also cause the blender to go into safety mode and display a red light.

If you suspect that the motor is malfunctioning, there are a few troubleshooting steps you can take. Firstly, unplug the blender and give it a few minutes to cool down. 

Overheating can sometimes cause the motor to malfunction. Once it has cooled down, inspect the blender’s base and make sure there are no loose connections or wiring issues. If everything looks intact, plug it back in and try again.

If the motor is still not working properly and the red light is blinking, it may be time to contact Ninja’s customer support or take the blender to a professional for repairs. 

They will be able to diagnose the issue and provide you with the necessary steps to either fix it yourself or get it fixed professionally. Keep in mind that attempting to repair the motor yourself may void any warranty that came with your blender.

Another possibility is that the blade is jammed or not spinning freely. This can happen if the blender is overloaded with ingredients or if something is stuck between the blades. 

To troubleshoot this issue, first, make sure the blender is turned off and unplugged. Then, carefully remove the jar from the base and inspect the blades for any obstructions. Use a long spoon or spatula to dislodge any stuck food particles.

After removing any obstructions, reattach the jar to the base and try running the blender again. If the red light is still blinking, there might be a more serious issue at play. 

In this case, it’s best to contact Ninja’s customer support for further assistance. They may be able to guide you through additional troubleshooting steps or advise you on the best course of action to fix the problem. 

Remember, always prioritize your safety, and never attempt to disassemble the blade assembly yourself.

Possible Cause 4: Electrical issues and power supply problems

Electrical issues can often be the reason behind the irritating blinking red light on your Ninja blender. When faced with this problem, it is essential to approach it with caution and not overlook the possibility of electrical malfunctions. 

Understanding the role of electrical issues in causing the blinking red light can help troubleshoot the problem effectively.

One possible reason for the blinking red light on your Ninja blender could be a faulty power supply. The blender relies on a consistent source of power to function properly, and any disruption to this supply can result in a blinking red light. 

It is recommended to check the power supply by ensuring that the blender is plugged into a working outlet or power source. The power cord connecting the blender to the outlet should also be examined for signs of damage or fraying, as this can contribute to electrical issues.

If the power supply seems to be intact, another probable cause of the blinking red light might be an electrical issue within the blender itself. 

This could include a malfunctioning motor or a wiring problem. In such cases, it is advisable to contact the manufacturer or a certified technician to assess and repair the blender. 

Attempting to fix electrical issues on your own can be dangerous and may result in further damage or even harm.

To avoid potential electrical problems, it is important to use the Ninja blender according to the manufacturer’s instructions. Overloading the blender can put excessive strain on the motor and electrical components, leading to issues such as a blinking red light. It is crucial to follow the recommended maximum capacity and not exceed it. 

Additionally, regularly cleaning the blender and ensuring that the blades are not obstructed can help prevent electrical issues.

If you have ruled out any potential electrical issues within the blender and the power supply is functioning correctly, there are a few suggestions to try and resolve the blinking red light.

 First, disconnect the blender from the power source and let it rest for a few minutes. This can help reset any internal electrical mechanisms that may have triggered the blinking light. 

If this does not work, try pressing the reset button (if available) or unplugging and plugging in the blender again. If the problem persists, it is best to reach out to the manufacturer’s customer support for further assistance.

Troubleshooting Tips: Resetting the blender and checking for blockages

Why is my Ninja Blender Blinking Red

Step 1: Resetting the Ninja Blender

When confronted with a blinking red light on your Ninja Blender, the first step is to try resetting the blender. To do this, start by unplugging the blender from the power source.

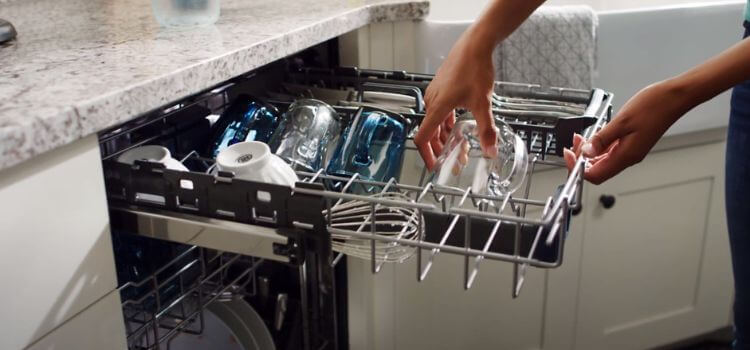
 Next, take a moment to inspect the blender and ensure that all parts are securely in place. After double-checking the assembly, plug the blender back in and try turning it on again. In many cases, this simple reset can resolve the issue and the blinking red light will disappear.

Step 2: Checking for blockages

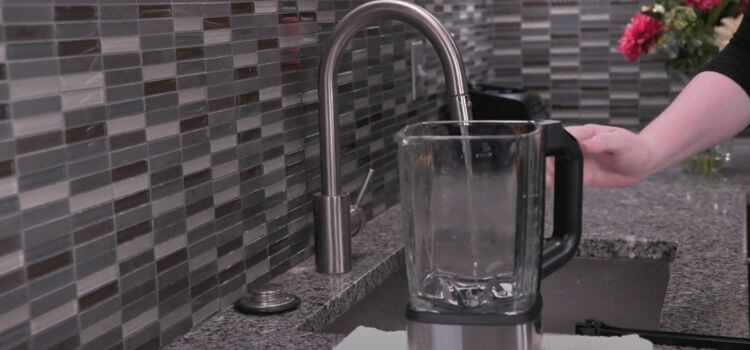
If resetting the blender does not resolve the blinking red light, it is important to check for any blockages that may be causing the problem. Begin by unplugging the blender and removing the pitcher or cup from the base.

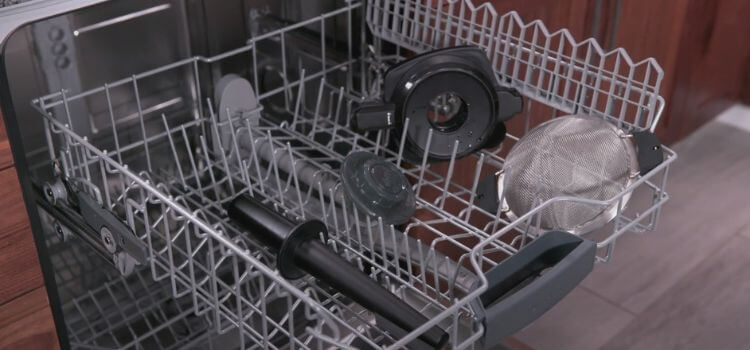
 Inspect the pitcher or cup for any leftover food particles, especially around the blade assembly. Use a dishcloth or sponge to gently clean the inside and outside of the pitcher or cup. 

Additionally, inspect the base of the blender for any debris that may have accumulated. If any blockages are present, carefully remove them using a kitchen tool like a long brush or a toothpick.

By following these troubleshooting tips, you can effectively address the blinking red light issue on your Ninja Blender. Resetting the blender and ensuring there are no blockages will often resolve the problem and allow you to continue using your blender without any further issues. 

However, if the blinking red light persists even after these steps, it is recommended to contact Ninja customer support for further assistance. They will be able to provide personalized advice and help troubleshoot the issue on a deeper level.

Ninja Blender care and maintenance for avoiding red light issues

Proper maintenance is crucial to avoid encountering blinking red light issues with your Ninja Blender. By following a few simple tips, you can ensure the longevity of your blender and minimize the chances of any malfunctions.

 Firstly, it is essential to regularly clean your blender after each use. Leftover food particles can accumulate and cause the blender to overheat, resulting in the blinking red light. Cleaning the blender thoroughly will eliminate any potential buildup.

Providing tips on proper maintenance to prevent blinking red light incidents

Regular lubrication of the blender’s motor is another important aspect of maintenance. Over time, the motor’s bearings can wear out, leading to increased friction and heat generation. 

By lubricating the motor at regular intervals, you can reduce these issues and prevent the blinking red light from appearing.

Moreover, it is advisable to inspect the blender’s blades periodically. Dull or damaged blades can put unnecessary strain on the motor, causing it to overheat and trigger the blinking red light. 

If you notice any signs of wear or damage, it may be necessary to replace the blades to ensure optimal performance and prevent any malfunctions.

Advice on regular cleaning, lubrication, and blade inspections

Why is my Ninja Blender Blinking Red

Regular cleaning, lubrication, and blade inspections are crucial for the proper functioning of your Ninja Blender. By incorporating these practices into your blender care routine, you can avoid encountering blinking red light issues.

 Remember to always operate the blender within the recommended usage guidelines, as exceeding the recommended limits can also lead to overheating and the appearance of a blinking red light.

Conclusion

This article has shed light on the perplexing issue of the Ninja Blender blinking red light. By delving into the possible causes and troubleshooting methods, we have empowered readers to take charge of their blending experiences. 

Identifying and resolving blinking red light issues is crucial for a seamless kitchen and dining experience. As consumers, it is essential for us to be proactive in resolving these issues, ensuring smooth blending experiences every time. 

By understanding the importance of addressing blinking red light problems, we can create a stress-free and efficient environment in our kitchens. So next time you encounter this alarming red light, remember the steps outlined in this article and take action swiftly. 

Stay proactive, resolve the issue, and savor the delights of a flawless blending endeavor.

Filed Under: Blender, Ninja Blender

How to make Ice cream in a Ninja Blender?

August 26, 2023 by sufian Leave a Comment

The Ninja Blender has undeniably taken the culinary world by storm with its unrivaled popularity and unmatched versatility in the kitchen.

From whipping up smoothies to crushing ice with ease, this powerful blender has become a staple appliance for many home cooks and professional chefs alike.

In this blog post, we will dive into the realm of frozen desserts and explore the fascinating process of making ice cream using a Ninja Blender. Prepare to turn your kitchen into a homemade ice cream parlor as we uncover the secrets and techniques to create irresistibly creamy and delicious frozen treats with the help of this exceptional kitchen companion.

So, grab your Ninja Blender, and let’s embark on a frosty adventure that is sure to delight your taste buds!

Benefits of making ice cream in a Ninja Blender:

How to make Ice cream in a Ninja Blender

When it comes to enjoying cold and creamy treats, nothing beats homemade ice cream. Not only do you have complete control over the ingredients, but you can also customize your flavors to suit your taste buds.

Making ice cream in a Ninja Blender has its own set of advantages that make this process quick and convenient.

Firstly, homemade ice cream allows you to have full control over what goes into your dessert. Unlike store-bought options, you can choose fresh and high-quality ingredients, ensuring a healthier and more delicious treat.

By using a Ninja Blender, you can easily blend together your desired combination of fruits, nuts, chocolates, or any other flavorings without worrying about hidden additives or preservatives.

This makes homemade ice cream a perfect choice for those with dietary restrictions or allergies.

In addition to controlling the ingredients, making ice cream in a Ninja Blender offers the advantage of customization. You can experiment with various flavor combinations, creating unique and exciting tastes that are simply not available at your local grocery store.

Whether you prefer classic flavors like vanilla and chocolate or more adventurous ones like matcha or lavender, a Ninja Blender can effortlessly whip up your dream ice cream. The possibilities are endless!

Moreover, a Ninja Blender makes the ice cream-making process quick and convenient. With its powerful motor and sharp blades, this blender can expertly blend all the ingredients together into a smooth and creamy texture in seconds.

No more standing by a noisy ice cream machine or dealing with complicated churning processes. Simply add your ingredients to the blender, give it a whirl, and you’ll have homemade ice cream ready to enjoy in no time.

Furthermore, a Ninja Blender offers versatility beyond just making ice cream. It can be used for a variety of other kitchen tasks as well. From blending smoothies and soups to creating delicious sauces and dips, this appliance has become an essential tool in any kitchen.

Its multi-functional capabilities make it a valuable investment for any ice cream lover.

Preparing the Ninja Blender:

The first step in making ice cream in a Ninja Blender is to ensure that the blender is properly set up and ready for use. Start by checking that all the necessary parts are intact and in good condition.

This includes the pitcher, blades, and lid of the blender. Make sure that everything is securely in place and there are no loose or damaged parts.

Next, it is crucial to thoroughly clean the blender before using it to make ice cream. This will help ensure that there are no lingering flavors or odors from previous blends.

Start by disassembling the blender and washing each component with warm soapy water. Pay special attention to the pitcher and blades as these are the parts that will come into direct contact with the ice cream ingredients.

Rinse the parts thoroughly to remove any soap residue, and then allow them to air dry completely before reassembling.

Once the blender is clean and dry, it is ready to be used for making ice cream. Before adding any ingredients, it is a good idea to run the blender for a few seconds to ensure that everything is working properly.

This will also help eliminate any remaining water or moisture that may have been missed during the cleaning process. Simply turn the blender on and let it run for a couple of seconds before turning it off and proceeding with the ice cream-making process.

To ensure the best results when making ice cream in a Ninja Blender, it is important to follow a few additional tips.

Firstly, make sure that the ingredients are properly chilled before blending them. This will help prevent the ice cream mixture from melting too quickly during the blending process.

Additionally, it is recommended to use frozen fruit or ice cubes to help keep the mixture cold and thick. Lastly, avoid overfilling the pitcher as this may prevent the ingredients from blending evenly and smoothly.

Step-by-step process of making ice cream:

How to make Ice cream in a Ninja Blender

As summer approaches, there’s nothing quite as satisfying and refreshing as a creamy scoop of homemade ice cream. But did you know that you can make ice cream right in your very own kitchen using a Ninja Blender? In this blog post, we will guide you through the step-by-step process of making delicious ice cream using this versatile kitchen appliance.

Step 1: Gather Your Ingredients

Before you begin, ensure you have all the necessary ingredients on hand. Traditional ice cream usually requires heavy cream, whole milk, sugar, and flavorings such as vanilla extract.

However, the beauty of making ice cream in a Ninja Blender is that you can adapt the recipe to suit your preferences. Want a dairy-free option? Substitute the heavy cream and milk with coconut milk or almond milk.

Craving a different taste? Experiment with different flavorings such as cocoa powder, fruit puree, or even coffee.

Step 2: Add the Ingredients to Your Blender

Once you have your desired ingredients, pour them into the Ninja Blender. Start with the liquid components like milk, cream, or alternative milk, and then add the sugar and flavorings.

It’s important to add the ingredients in the order specified by the recipe to ensure proper blending. This will help achieve a smooth and creamy consistency

.Step 3: Blend Until Creamy

Once all the ingredients are added, secure the lid of your Ninja Blender tightly. Start with a low-speed setting and gradually increase the speed until the mixture is fully blended and smooth.

The powerful blades of the Ninja Blender will effortlessly incorporate all the ingredients, resulting in a creamy base for your ice cream.

Step 4: Achieve the Desired Consistency

To achieve the desired ice cream consistency, you may need to put the blended mixture in the freezer for a period of time. This step allows the ice cream to firm up and develop a smooth texture.

Be sure to check the recipe for specific instructions on how long to freeze the mixture to reach the desired consistency. You can also consider adding mix-ins such as crushed cookies, chopped nuts, or swirls of caramel during this freezing process to enhance the flavor and texture of your ice cream.

Step 5: Serve and Enjoy!

After the ice cream has reached the desired consistency, it’s time to serve and enjoy the fruits of your labor. Scoop the ice cream into bowls or cones and top it with your favorite toppings. 

Troubleshooting common issues:

Making homemade ice cream with a Ninja Blender can be a delightful experience, but sometimes we encounter a few hiccups along the way.

In this section, we will address some common problems that may occur during the ice cream-making process and provide you with practical solutions and tips to overcome these challenges with your Ninja Blender.

Issue 1: Ice Cream Not Thickening as Expected

Sometimes, you may find that your ice cream mixture is not thickening to the desired consistency. T

his can be due to several reasons, such as using too much liquid or not freezing the mixture prior to blending. To overcome this issue, ensure that you follow the recipe proportions precisely and adjust the liquid content accordingly.

Additionally, make sure to freeze your ice cream base for a few hours before blending to improve the thickness. Adding a small amount of cornstarch or guar gum can also enhance the texture and help thicken the ice cream.

Issue 2: Lumpy Texture

If you notice lumps or chunks in your ice cream, it could be due to insufficient blending time or not allowing the ice cream mixture to chill thoroughly before blending.

To avoid this problem, blend the mixture for an extra minute or until it becomes smooth and creamy. Moreover, ensure that your individual ingredients, such as fruits or chocolates, are chopped into smaller pieces before adding them to the blender. This will help achieve a smoother texture throughout.

Issue 3: Overheating the Blender Motor

When making ice cream using a Ninja Blender, it’s important to keep an eye on the blender’s motor temperature. Continuous blending for an extended period can cause the motor to overheat, resulting in poor performance.

To prevent this, it is recommended to blend the ice cream mixture in intervals, allowing the blender to rest for a few minutes between each blending session.

Additionally, ensure that the lid is secured tightly, preventing the mixture from leaking and causing potential damage to the motor.

Issue 4: Ice Crystals in the Ice Cream

The formation of ice crystals is a common issue when making homemade ice cream.To minimize this problem, make sure to freeze your ice cream maker bowl or container before starting the process.

Additionally, cover your ice cream mixture with a plastic wrap tightly, directly touching the surface to prevent air exposure.

This will help maintain a consistent temperature and reduce the chances of ice crystals forming in your ice cream.

Tips for achieving the perfect texture:

How to make Ice cream in a Ninja Blender

When it comes to making homemade ice cream in a Ninja Blender, achieving the perfect texture is crucial for a satisfying dessert experience.

By following a few tips and tricks, you can create a creamy and smooth ice cream right in the comfort of your own kitchen.

One vital factor in achieving the desired texture is the blending time. It is recommended to blend the mixture for a longer duration to ensure all the ingredients are well incorporated.

The Ninja Blender’s powerful motor can handle extended blending without compromising the texture. Aim for a blending time of at least 3-4 minutes to allow the ice cream base to become smooth and creamy.

Another essential tip is to ensure the ingredients are properly chilled before blending. Cold ingredients not only help prevent ice crystals from forming but also allow for a creamier texture.

It is suggested to refrigerate all the ingredients beforehand, including the ice cream base, fruits, and any other mix-ins you may want to add. This will help maintain the desired consistency throughout the blending process.

Furthermore, controlling the speed and pulsing techniques are key factors in achieving the ideal ice cream texture. Start by blending the liquid base on a low speed and gradually increase it to medium-high for a thorough mix.

For incorporating mix-ins like fruits or nuts, utilize the pulsing function to prevent over-blending and maintain their texture. Remember, it’s important to strike a balance between blending thoroughly and preserving the integrity of the added ingredients.

Additionally, paying attention to the quality of the ingredients used can greatly influence the texture of your homemade ice cream. Opt for high-quality dairy products like full-fat milk, cream, and premium vanilla extract.

Using these ingredients will contribute to a richer and creamier ice cream. Additionally, choosing ripe and flavorful fruits or high-quality chocolate and nuts for mix-ins will elevate the overall texture and taste.

Lastly, storing the ice cream properly after blending is crucial in maintaining the desired texture. Transfer the freshly made ice cream into an airtight container and place it in the freezer.

Ensure that the container seals tightly to prevent ice crystals from forming. To maintain the creamy texture, it is recommended to stir the ice cream once or twice within the first few hours of freezing.

This helps break up any ice crystals that may have formed and results in a smoother final product.

Storing Homemade Ice Cream:

How to make Ice cream in a Ninja Blender

Homemade ice cream is a delightful treat that can be made effortlessly using a Ninja Blender. Once you have successfully churned your ice cream to perfection, it is crucial to store it properly to maintain its freshness and prevent dreaded freezer burn.

By following a few simple guidelines, you can ensure that your homemade ice cream retains its creamy texture and delightful taste.

To begin with, it is advisable to transfer your freshly made ice cream into an airtight container.

Freezer-safe glass or plastic containers with lids work best for this purpose. By sealing the ice cream tightly, you can prevent any unwanted flavors or odors from permeating the batch.

Once the ice cream is safely stored, it is essential to place it at the back of your freezer, where it is less susceptible to temperature fluctuations.

By avoiding the freezer door, you can minimize exposure to warm air each time the door is opened, which could result in freezer burn.

Preventing freezer burn is crucial to maintaining the quality of your homemade ice cream. This undesirable condition occurs when moisture is lost from the ice cream, causing it to develop a grainy texture and, sometimes, an unpleasant taste.

To prevent this, it is recommended to layer a sheet of plastic wrap directly on the surface of the ice cream before sealing the container. This extra barrier will help preserve moisture and minimize the risk of freezer burn.

Moreover, to ensure the longevity of your homemade ice cream, it is advisable to consume it within three months of freezing.

While ice cream can technically remain safe to eat for longer, its quality might gradually diminish over time. To keep track of the storage duration, consider labeling the container with the date it was made.

Conclusion:

Learning how to make ice cream in a Ninja Blender opens up a world of endless possibilities for creating delicious frozen treats at home.

Through this blog article, we have explored the various creative ways to serve and enjoy homemade ice cream made with this versatile appliance.

We have emphasized the importance of presentation and how it can enhance the overall ice cream experience. By paying attention to details and considering different toppings or garnishes, one can transform a simple scoop of ice cream into a visually stunning masterpiece.

Whether it’s a drizzle of chocolate syrup, a sprinkle of crushed nuts, or a dollop of whipped cream, the possibilities for garnishing are limitless.

Additionally, we have highlighted the significance of experimenting with different flavor combinations, textures, and even serving vessels, like waffle cones or bowls made from cookie dough.

As we conclude this article, it is essential to note that the true joy of serving and enjoying ice cream lies in the creativity and personalization that comes with it.

By utilizing a Ninja Blender to create homemade ice cream, individuals have the power to tailor their frozen creations to suit their tastes and preferences.

So, with your Ninja Blender in hand, let your imagination run wild, explore new flavor profiles, and experiment with unique serving techniques.

Get ready to delight your family and friends with the ultimate homemade ice cream experience that leaves lasting memories.

Filed Under: Ninja Blender

Is the Ninja Blender dishwasher safe?

August 26, 2023 by sufian Leave a Comment

In today’s bustling world, kitchen appliances have become an indispensable part of our daily lives. From whipping delicious smoothies to creating gourmet meals, these appliances have made our cooking experiences more efficient and enjoyable.

However, one crucial aspect that often goes unnoticed is the importance of dishwasher-safe kitchen appliances.

In this blog post, we delve into why it is essential to invest in dishwasher-safe appliances, with a particular focus on the renowned Ninja blender.

Join us as we explore the question on everyone’s mind: Is the Ninja Blender dishwasher safe?

What makes a blender dishwasher safe?

Is the Ninja Blender dishwasher safe

When it comes to determining if a blender is dishwasher safe, there are several key factors to consider. The materials used in the construction of the blender, the various parts that make up the blender, and the design features all play a role in determining if a blender is suitable for dishwasher use.

Materials:

One of the first things to consider is the materials used in the blender. The blender jar should be made from materials that are durable and resistant to high heat and vigorous water pressure in a dishwasher.

 Most dishwasher-safe blenders will have jars made from BPA-free plastic or glass, as these materials are known for their ability to withstand the dishwasher’s cleaning cycle without breaking or warping.

Parts:

In addition to the materials used in the blender, it is important to consider the various parts that make up the blender.

 Dishwasher-safe blenders generally have removable parts that are safe to be cleaned in the dishwasher. This includes the blender blades, lids, and any additional attachments or accessories.

 However, it is always recommended to consult the blender’s manual or official website to ensure that all of the parts are indeed dishwasher safe.

Design Features:

Lastly, the design features of the blender can also determine if it is dishwasher safe. Some blenders have a seamless design with fewer cracks and crevices, which makes them easier to clean and less likely to trap food particles. 

The benefits of a dishwasher-safe blender:

The Ninja Blender is undoubtedly a powerful and versatile kitchen appliance that has gained popularity among home cooks and professional chefs alike.

One of the most prominent questions that potential buyers often ask is whether it is dishwasher safe. Thankfully, Ninja Blenders come with dishwasher-safe components, making clean-up a breeze and saving users precious time and effort.

The benefits of a dishwasher-safe blender are numerous and cannot be overstated. Firstly, the convenience of being able to place the blender parts directly in the dishwasher is invaluable.

After enjoying a refreshing smoothie or whipping up some delicious sauces, the last thing you want to do is spend precious time scrubbing and cleaning blender components by hand.

With a dishwasher-safe Ninja Blender, you can simply remove the parts, place them in the dishwasher, and let the machine do the work for you.

Additionally, the time-saving aspect of using a dishwasher-safe blender cannot be ignored. In our busy lives, every second counts, and being able to toss blender parts into the dishwasher allows us to focus on other tasks while the dishwasher takes care of the cleaning.

This is particularly beneficial for those who regularly use their blender for multiple recipes throughout the day and want to minimize the time spent on laborious clean-up.

In terms of cleaning and maintenance, a dishwasher-safe Ninja Blender is an absolute game-changer. Not only does it make the cleaning process more efficient, but it also ensures that all the nooks and crannies of the blender parts are thoroughly cleaned.

This is especially crucial for blenders with complex blade assemblies, as these can sometimes be challenging to clean by hand. By using the dishwasher, you can rest assured that all parts are being adequately sanitized and ready for your next culinary adventure.

Some users may worry about the durability and wear and tear caused by frequent dishwasher use. However, Ninja Blenders are specifically designed with high-quality materials that can withstand the rigors of dishwasher cleaning.  

Ensuring longevity with a dishwasher-safe blender:

Is the Ninja Blender dishwasher safe

When it comes to kitchen appliances, durability and longevity are of utmost importance. The Ninja Blender is a popular choice among many home cooks and smoothie enthusiasts, and one common question that arises is whether it is dishwasher safe.

Thankfully, the answer is yes! The Ninja Blender is indeed dishwasher safe, making it a convenient and time-saving option for those who prefer to clean their appliances in the dishwasher.

Explaining how a dishwasher-safe blender can prolong its lifespan:

Having a dishwasher-safe blender is not only convenient but also beneficial for the longevity of the appliance.

This is because cleaning the blender in the dishwasher ensures a thorough and consistent cleaning process.

The high temperatures and powerful jets of water in the dishwasher effectively remove any food residue or stubborn stains, which can accumulate over time and potentially affect the blender’s performance.

By regularly cleaning the blender in the dishwasher, you can help extend its lifespan and ensure it continues to function optimally for years to come.

Tips on properly caring for and maintaining the blender:

While the Ninja Blender is dishwasher safe, it is important to note a few key tips to ensure its longevity.

Firstly, always make sure to read the manufacturer’s instructions and guidelines before placing the blender in the dishwasher. Some blender parts, such as the motor base or blades, may not be dishwasher safe and could become damaged if exposed to the intense heat and agitation.

Secondly, it is advisable to disassemble the blender and separate the components before placing them in the dishwasher.

This will ensure a thorough cleaning and prevent any parts from getting trapped or damaged during the wash cycle.

Additionally, it is recommended to use a gentle dishwasher detergent or a specific dishwasher-safe blender cleaning solution.

Harsh chemicals or abrasive scrubbers should be avoided as they can damage the blender’s surface or cause the components to deteriorate over time.

How to identify if your Ninja blender is dishwasher safe:

When it comes to kitchen appliances, cleaning can often become a tedious task. The Ninja Blender, known for its powerful performance and versatility, is a popular choice among home cooks and professionals alike. But the question remains: is the Ninja Blender dishwasher safe? 

In this blog section, we will provide guidance on how to identify if your Ninja blender is dishwasher safe, including tips on finding the necessary information in the user manual or product specifications, as well as advice on contacting the manufacturer to confirm dishwasher compatibility.

To determine whether your Ninja Blender is dishwasher safe, the first step is to consult the user manual or product specifications provided by the manufacturer.

Most reputable brands, including Ninja, provide detailed information regarding the dishwasher compatibility of their appliances.

Look for sections titled “Cleaning and Maintenance” or “Care Instructions” where you’ll likely find specific instructions on whether or not the blender components can be safely washed in the dishwasher.

Tips for Finding the Necessary Information in the User Manual or Product Specifications

Sometimes finding the information you need in a user manual can be challenging. To locate information about the dishwasher compatibility of your Ninja Blender, start by browsing through the table of contents.

Look for keywords such as “cleaning,” “washing,” or “dishwasher.” If you still can’t find the relevant information, try using the search function (if available) or perform a keyword search online using the model number of your Ninja Blender and the term “dishwasher safe.” The manufacturer’s website or online forums may provide additional details or clarification.

Contacting the Manufacturer to Confirm Dishwasher Compatibility

f you’re unable to locate the dishwasher safety information for your Ninja Blender in the user manual or online, the best course of action is to contact the manufacturer directly.

Most manufacturers have customer service departments dedicated to assisting customers with any queries or concerns. Seek out their contact information, which is typically available on the manufacturer’s website or in the user manual.

When it comes to kitchen appliances, cleaning can often become a tedious task. The Ninja Blender, known for its powerful performance and versatility, is a popular choice among home cooks and professionals alike. But the question remains: is the Ninja Blender dishwasher safe? In this blog section, we will provide guidance on how to identify if your Ninja blender is dishwasher safe, including tips on finding the necessary information in the user manual or product specifications, as well as advice on contacting the manufacturer to confirm dishwasher compatibility.

How to Identify if Your Ninja Blender is Dishwasher Safe

Is the Ninja Blender dishwasher safe

To determine whether your Ninja Blender is dishwasher safe, the first step is to consult the user manual or product specifications provided by the manufacturer.

Most reputable brands, including Ninja, provide detailed information regarding the dishwasher compatibility of their appliances.

Look for sections titled “Cleaning and Maintenance” or “Care Instructions” where you’ll likely find specific instructions on whether or not the blender components can be safely washed in the dishwasher.

Tips for Finding the Necessary Information in the User Manual or Product Specifications

Sometimes finding the information you need in a user manual can be challenging. To locate information about the dishwasher compatibility of your Ninja Blender, start by browsing through the table of contents.

Look for keywords such as “cleaning,” “washing,” or “dishwasher.” If you still can’t find the relevant information, try using the search function (if available) or perform a keyword search online using the model number of your Ninja Blender and the term “dishwasher safe.” The manufacturer’s website or online forums may provide additional details or clarification.

Contacting the Manufacturer to Confirm Dishwasher Compatibility

If you’re unable to locate the dishwasher safety information for your Ninja Blender in the user manual or online, the best course of action is to contact the manufacturer directly.

Most manufacturers have customer service departments dedicated to assisting customers with any queries or concerns. Seek out their contact information, which is typically available on the manufacturer’s website or in the user manual.

Troubleshooting common dishwasher-related blender issues:

When it comes to kitchen appliances, dishwasher safety is always an important consideration. Many people wonder if their Ninja Blender is safe to be cleaned in the dishwasher.

In this blog section, we will address this question and provide helpful information to ensure the proper care and maintenance of your blender.

Identification and solutions for common problems that may arise when using a dishwasher for blenders.

One of the common issues that can occur when cleaning your Ninja Blender in the dishwasher is the build-up of residue. This residue can be caused by food particles or detergents not fully rinsed away during the dishwasher cycle.

To resolve this issue, it is recommended to pre-rinse the blender components before placing them in the dishwasher.

Additionally, using a dishwasher-safe brush or sponge to lightly scrub any stubborn residue can help maintain a clean and spotless blender.

Another problem that can arise is the formation of unpleasant odors. This may be caused by leftover food or liquids trapped in the blender components.

To eliminate odors, it is advised to thoroughly rinse the blender parts before loading them into the dishwasher. Adding a small amount of vinegar to the dishwasher during the cycle can also help remove any lingering smells.

Advice on resolving issues such as residue or unpleasant odors

In case you are experiencing persistent residue or unpleasant odors even after following the previous steps, it is recommended to switch to hand-washing your Ninja Blender.

Hand-washing allows for better control over the cleaning process and ensures a thorough clean. Using warm soapy water and a non-abrasive sponge, carefully clean all the blender components, paying extra attention to the blender blades.

Furthermore, to maintain the longevity of your Ninja Blender, it is essential to follow the manufacturer’s instructions regarding dishwasher safety.

Testimonials from Ninja blender users:

Many Ninja blender users have expressed their satisfaction with the dishwasher safety of their blenders. One user, Sarah, mentioned how she has been using her Ninja blender for over a year and has been regularly cleaning it in the dishwasher without any issues.

She confirms that all the parts of the blender go in the dishwasher and come out sparkling clean. Another user, John, shared that he was initially hesitant about putting his Ninja blender in the dishwasher, but after reading the user manual thoroughly, he felt confident in doing so.

He has been using his Ninja blender in the dishwasher for months now and has not faced any problems.

Sharing customer experiences and feedback regarding the dishwasher safety of their Ninja blenders can help potential buyers in making an informed decision.

These testimonials provide personal insights into the convenience and efficiency of using a dishwasher for cleaning the Ninja blender.

Convenience and efficiency of using a dishwasher:

Using a dishwasher for cleaning the Ninja blender can be highly convenient for busy individuals. It eliminates the need for manual scrubbing and soaking, saving valuable time and effort.

Users can simply detach the blender components, place them in the dishwasher, and let the machine do the work.

The dishwasher ensures a thorough and hygienic cleaning of the blender, removing any residue or food particles that may have been left behind.

Furthermore, using a dishwasher can also be more efficient than manual cleaning. Dishwashers are designed to conserve water and energy, making them a more environmentally friendly option.

Additionally, the high-temperature water and steam in dishwashers can effectively sanitize the blender parts, ensuring a safe and hygienic blending experience.

Conclusion:

After thoroughly examining the question of whether the Ninja Blender is dishwasher safe, it is clear that investing in a dishwasher safe model is a wise choice for an effortless kitchen experience. Throughout this article, we have highlighted the main points that support this conclusion.

First and foremost, the convenience of being able to simply place the blender components in the dishwasher cannot be overstated.

No more tedious handwashing or struggling to clean hard-to-reach areas. With a dishwasher safe Ninja Blender, you can effortlessly maintain hygiene and cleanliness in your kitchen.

Furthermore, the fact that the blender is designed to withstand the dishwasher’s heat and rigorous washing cycle is a testament to its durability.

This ensures that your Ninja Blender will maintain its performance and longevity, giving you peace of mind in your investment.

Lastly, the importance of having a dishwasher safe blender extends beyond convenience.

It minimizes the risk of cross-contamination and foodborne illnesses. The thorough cleaning provided by the dishwasher eliminates any remnants of food or bacteria, ensuring the safety of your meals.

So go ahead, invest in a dishwasher safe Ninja Blender, and enjoy a hassle-free, and efficient kitchen experience like never before.

Filed Under: Ninja Blender

Why won’t my Ninja Blender work?

August 8, 2023 by sufian Leave a Comment

In the realm of kitchen gadgets, few appliances have gained as much popularity and praise as Ninja Blenders.

With their sleek designs and high-performance capabilities, these household powerhouses have become a staple for countless kitchen enthusiasts.

If you’re new to the world of Ninja Blenders, understanding their purpose and features is crucial. In this blog post, we will delve into the basics of Ninja Blenders, explaining why they are favored by so many and uncovering their secrets to success.

So, the next time you find yourself asking, “Why won’t my Ninja Blender work?” stick around, as we are about to unveil the answers.

Why won't my Ninja Blender work

Troubleshooting Guide: 

When it comes to kitchen appliances, a malfunctioning blender can really put a wrench in your meal prep plans. If you’re experiencing issues with your Ninja Blender, fear not!

We’ve put together this troubleshooting guide to help you identify common problems and provide step-by-step solutions to get your blender up and running again.

1. Power Supply Issues
One of the most common reasons for blender failure is a power supply problem. Before panicking, make sure your blender is properly plugged in and the power source is functioning.

Sometimes, a loose or damaged power cord can also cause issues. If you suspect this is the case, try wiggling or reattaching the cord to see if it makes a difference. If necessary, replace the cord altogether.

2. Overheating Motor
Blenders are designed to handle tough blending tasks, but they can still overheat if pushed beyond their limits.

If your Ninja Blender suddenly stops mid-blend and doesn’t turn on again, it may be due to an overheated motor.

Give it some time to cool down before attempting to use it again. To prevent overheating in the future, try blending in shorter bursts with breaks in between.

3. Clogged Blades
Blending thick or fibrous ingredients can sometimes lead to a clogged blade assembly. If your Ninja Blender is not blending properly or making unusual noises, it could be a sign of clogged blades.

Start by unplugging the blender and carefully removing the blade assembly. Use a brush or toothpick to clean any debris or food particles stuck in the blades. Once cleaned, reassemble the blender and give it another try.

4. Faulty Buttons or Controls
If your Ninja Blender’s buttons or controls are not responding, it could be an issue with the internal wiring or the control panel itself.

Before taking any further action, try resetting the blender by unplugging it and plugging it back in.

If that doesn’t work, consult the user manual for instructions on how to recalibrate or replace the buttons or controls. If needed, contact customer support for additional assistance.

5. Motor or Blender Jar Assembly Issues
In some cases, blender failure could be due to a malfunctioning motor or blender jar assembly.

If you’ve ruled out all other potential issues and your Ninja Blender still won’t work, it may be time to consider replacing these components.

Check if your blender is still under warranty and contact the manufacturer for further guidance.

Care and Maintenance Tips for Ninja Blenders:

Why won't my Ninja Blender work

Ninja blenders are known for their powerful performance and ability to create smooth, blended concoctions with ease.

However, like any other kitchen appliance, they do require proper care and maintenance to ensure their longevity and smooth functioning.

Understanding the importance of proper maintenance can help troubleshoot and address any issues that may arise with your Ninja Blender.

Here are some practical tips to clean, store, and handle your Ninja Blender correctly.

Cleaning Your Ninja Blender

Regularly cleaning your Ninja Blender is crucial to prevent the build-up of food particles and residue, which can affect its performance.

After each use, make sure to disassemble the blender carefully and wash the blades, pitcher, and lid with warm, soapy water.

Use a scrub brush or sponge to remove any stubborn stains or residue. It’s important to avoid immersing the blender base in water, as it contains electrical components.

Instead, simply wipe it down with a damp cloth. Remember to dry all the parts thoroughly before reassembling the blender.

Proper Storage

When not in use, it’s important to store your Ninja Blender properly to protect it from dust and damage.

Ensure that all the parts of the blender are completely dry before storing them. Store the blender base in a dry place away from direct sunlight and extreme heat.

It’s recommended to stack the blender components in a safe and organized manner to avoid any accidental damage.

Handling Your Ninja Blender

Properly handling your Ninja Blender is essential to prevent any operational issues.

When using your blender, make sure to lock the pitcher securely onto the base and ensure the lid is securely fastened to avoid any leakage. Avoid overfilling the pitcher to prevent overflow.

Never remove the pitcher or tamper while the blender is in operation, as this can lead to injury or malfunction.

Additionally, ensure that the power cord is not twisted or tangled, as it can affect the blender’s performance.

Regular Maintenance and Inspection

To keep your Ninja Blender in optimal condition, it’s advised to regularly inspect the blender’s parts for any signs of wear, tear, or damage.

Check the blades, pitcher, and lid for cracks or chips regularly. If you notice any damage or irregularities, it’s important to replace the affected parts promptly.

Also, keep an eye on the blender’s power cord for any fraying or exposed wires, as this can be a safety hazard. 

Replacing Blender Parts: 

When it comes to kitchen appliances, the Ninja Blender is regarded as one of the best. However, even the most reliable and efficient blenders can encounter issues from time to time.

One common problem that users may face is the blender not working. This can be frustrating, especially when you need to whip up a quick smoothie or blend ingredients for a recipe.

In this blog post, we will explore the possible reasons why your Ninja Blender may not be working and offer guidance on how to fix it.

Exploring the essential components of a Ninja Blender and their functions

To understand why your Ninja Blender is not working, it is essential to have a basic understanding of its parts and functions.

The key components of a Ninja Blender include the motor, pitcher, blade assembly, and control panel. The motor serves as the power source, while the pitcher is where you place your ingredients.

The blade assembly, on the other hand, is responsible for blending and chopping the ingredients. Lastly, the control panel enables you to control the blender’s speed and settings.

Guiding users on how to identify and replace faulty blender parts:

If your Ninja Blender is not working, the first step is to identify the faulty part. Start by inspecting the power cord and ensuring it is properly connected to a working outlet.

If the power cord seems intact, move on to examining the pitcher for any cracks or damage. A cracked pitcher can affect the blender’s performance and may need to be replaced.

Next, check the blade assembly. Over time, the blades can become dull and worn out, hindering the blender from functioning correctly.

If you notice that the blades are no longer sharp, it might be time to replace them.

Moreover, make sure that the blade assembly is securely attached to the pitcher. Loose or detached blades can prevent the blender from working efficiently.

In some cases, the issue might be with the motor. If the blender’s motor is making unusual noises or not turning on at all, it could indicate a problem with the motor itself.

Unfortunately, fixing a faulty motor generally requires professional assistance or contacting the manufacturer for a replacement.

Comparing Ninja Blender Models: 

When it comes to blending, Ninja Blender has gained a reputation for its powerful performance and durability.

However, there may come a time when you find yourself struggling with a malfunctioning blender.

Understanding the reasons behind your Ninja Blender not working can help you troubleshoot the issue effectively.

Let’s delve into some possible factors that could be causing your Ninja Blender to malfunction.

Incorrect Assembly of Operation

One of the most common reasons why your Ninja Blender may not be working is due to incorrect assembly or operation. Make sure all parts are properly aligned and securely locked into place.

Take a moment to review the user manual to ensure that you are using the blender correctly. Double-check the power connection and make sure the blender is plugged into a functioning outlet.

Simple oversight in assembly or operation can often be the cause of the issue.

Motor Overload

If you are attempting to blend a large quantity of ingredients or heavy substances, your Ninja Blender’s motor might become overloaded.

This can cause the blender to stop working or even blow a fuse. It is important to carefully follow the recommended blending capacity outlined in the user manual.

Overloading the blender can put excessive strain on the motor, leading to malfunction.

Blade Dullness or Damage

Over time, the blades of your Ninja Blender may become dull or damaged. This can significantly impact the blender’s performance.

If you notice that your blender is having difficulty blending ingredients smoothly or is making unusual noises, it might be time to replace the blades.

Contact Ninja Customer Support for assistance in getting replacement blades that are compatible with your specific blender model.

Power Supply Issues

Another possibility for your Ninja Blender not working could be related to the power supply. Check if the power cord is damaged or frayed.

Also, ensure that there is a stable power supply to the outlet you are using. Faulty wiring or power fluctuations can cause the blender to stop working.

It is advisable to try plugging the blender into a different outlet or using a surge protector to stabilize the power supply.

Malfunctioning Blender Motor

If you have exhausted all the above possibilities and your Ninja Blender is still not working, it could indicate a problem with the blender motor itself.

This is a less common occurrence as Ninja Blenders are known for their robust motors. However, if you suspect a motor malfunction, it is recommended to contact Ninja Customer Support for further assistance.

In conclusion, the advancements in technology that have been integrated into Ninja Blenders have revolutionized the blending experience for users.

From advanced motor technology to innovative blade designs, these blenders are now more powerful and efficient than ever before.

With the ability to effortlessly crush ice, blend smoothies, and create delicious recipes in seconds, Ninja Blenders have become a staple in many households.

However, as we look to the future, it’s important to ponder the potential developments in the blender industry.

With rapid advancements in technology, we can anticipate even greater performance and functionality from Ninja Blenders.

Imagine blenders that are not only capable of blending, but also cooking, steaming, and performing other culinary tasks with precision and convenience.

Furthermore, the integration of smart technology into Ninja Blenders could provide users with personalized blending experiences, allowing for customized recipes and automatic adjustments based on individual preferences.

From smart sensors that can detect the ingredients in the blender to intuitive touchscreens that provide step-by-step guidance, the possibilities for future developments in Ninja Blenders are endless.

Filed Under: Ninja Blender

Can a Ninja Blender be Used as a Food Processor?

August 1, 2023 by sufian Leave a Comment

Are you constantly torn between investing in a blender or a food processor? Look no further! In this blog post, we explore the remarkable versatility of Ninja blenders in the kitchen and uncover the surprising similarity in functions with a food processor. 

Whether you’re an aspiring chef or simply enjoy experimenting with new recipes, the Ninja blender might just be the all-in-one kitchen tool you’ve been searching for. 

Join us as we delve into the capabilities of this remarkable appliance and answer the burning question: can a Ninja blender truly be used as a food processor?

Key differences:

can a ninja blender be used as a food processor

A Ninja blender and a food processor are both essential tools that can greatly ease your culinary tasks. 

However, it is important to note that while they may appear similar, they have distinct features and are designed for different purposes and capabilities. Understanding these differences will help you make the right choice for your kitchen.

Ninja blenders are primarily known for their exceptional blending capabilities. Equipped with incredibly sharp blades and a powerful motor, they effortlessly turn fruits, vegetables, and ice into smooth purees, juices, and smoothies. 

With multiple speed settings and various blending options, Ninja blenders allow for precise control and customization. 

Whether you want a silky-smooth smoothie or a chunkier texture, these blenders can cater to your preferences. Additionally, some Ninja blenders come with unique features like individual smoothie cups or the ability to crush ice.

On the other hand, food processors are built with the main purpose of chopping, slicing, dicing, and shredding ingredients. They excel at tasks that require precision and uniformity, such as slicing vegetables for salads or shredding cheese for toppings. 

Food processors often include various attachments and interchangeable blades, allowing you to customize the thickness of your slices or the size of your chops. Furthermore, their large capacity bowls make them ideal for handling batches of food, such as making dough or chopping large quantities of ingredients for a recipe.

While both Ninja blenders and food processors are kitchen workhorses, it is important to understand their limitations. While Ninja blenders can handle some food processing tasks, such as chopping or pureeing softer ingredients like fruits and vegetables, they may struggle with tougher and denser ingredients like nuts or hard cheeses. 

Their sharp blades and high-speed blending techniques are not the most efficient for achieving precise and uniform results, which is where a food processor shines. If you are looking to perform more complex food processing tasks, a dedicated food processor is definitely the better option.

Pros of Using a Ninja Blender as a Food Processor:

can a ninja blender be used as a food processor

1. Versatility:

One of the key advantages of using a Ninja blender as a food processor substitute is its versatility. With its powerful motor and sharp blades, a Ninja blender can effectively process a wide range of ingredients, from fruits and vegetables to nuts and seeds.

This versatility allows you to create various dishes, such as smoothies, soups, sauces, dips, and even homemade nut butters.

2. Cost-effective Solution:

Investing in a separate food processor can be quite expensive. By utilizing your Ninja blender for food processing tasks, you can save money and eliminate the need for another kitchen appliance. This cost-effective solution is especially beneficial for those who have limited kitchen space or are on a budget.

3. Time-saving:

The powerful motor of a Ninja blender can quickly and efficiently chop, blend, and puree ingredients. This time-saving feature can be incredibly advantageous when preparing meals or trying to meet a tight schedule. With its high-speed capabilities, a Ninja blender can swiftly reduce ingredients to the desired consistency, helping you achieve faster meal preparation without compromising quality.

Cons of Using a Ninja Blender as a Food Processor:

1. Limited Capacity:

One primary limitation of using a Ninja blender as a food processor substitute is its limited capacity. Blenders typically have smaller containers compared to food processors, making it challenging to process large quantities of ingredients at once.

This can be particularly inconvenient when preparing meals for a larger group or when dealing with recipes that require a high volume of processed ingredients.

2. Texture and Consistency:

While a Ninja blender excels at creating smooth purees and blending liquids, it may struggle to achieve the desired texture and consistency for certain food processing tasks. Food processors, with their multiple blades and specialized attachments, are specifically designed to provide more controlled results.

If you require prepping ingredients with precision, such as shredding, slicing, or grating, a dedicated food processor will deliver superior results.

Food processor’s advantages over a Ninja blender:

can a ninja blender be used as a food processor

When it comes to kitchen appliances, the Ninja blender and the food processor are two popular choices that often lead to confusion regarding their capabilities. While the Ninja blender is known for its exceptional blending abilities, it may not be the best option when it comes to certain tasks that are better suited for a food processor.

Let’s explore the advantages of a food processor over a Ninja blender and how its specialized attachments make a significant difference.

Shredding, slicing, and kneading dough are tasks that require precise and controlled movements, which is where a food processor shines. Unlike a Ninja blender, a food processor possesses specialized attachments that allow these specific tasks to be performed effortlessly.

The shredding and slicing attachments ensure uniform, consistent results, making it ideal for preparing vegetables for salads or grating cheese. Additionally, the dough blade attachment can knead dough to the perfect consistency, which is essential for baking enthusiasts.

Another advantage of a food processor is its large capacity and wider feeding chute, which allows for quicker and more efficient processing of larger quantities of food. This feature is particularly useful when prepping ingredients for a large family meal or when entertaining guests.

In contrast, the smaller capacity and narrower chute in a Ninja blender might require multiple batches to process the same amount of food, adding unnecessary time and effort to your cooking routine.

Furthermore, the variable speed options found in most food processors provide greater control over the desired consistency of your ingredients.

Creative uses of a Ninja blender aside from blending:

can a ninja blender be used as a food processor

When it comes to kitchen appliances, the Ninja blender is a versatile tool that goes beyond its primary function of blending fruits and vegetables.

As a powerful and efficient appliance, the Ninja blender can be used for various unconventional purposes, such as making homemade nut butter, grinding spices, and creating homemade baby food.

Let’s dive into how you can leverage the capabilities of a Ninja blender beyond simple blending.

Making homemade nut butter

With its powerful motor and sharp blades, a Ninja blender can easily transform nuts into creamy and delicious nut butter. Simply add your favorite nuts, like almonds or cashews, to the blender and let it blend on high speed.

Gradually, the nuts will break down, releasing their natural oils and turning into a smooth butter. You can customize the flavor by adding sweeteners or spices, resulting in a healthy and tasty alternative to store-bought nut butters.

Grinding spices

Forget about a mortar and pestle or manual spice grinder – a Ninja blender can effortlessly grind spices to perfection. Whether you want to make your own curry powder or grind whole spices like cinnamon or cloves, the high-speed blades of a Ninja blender excel at pulverizing them into a fine powder.

This allows you to retain the freshness and aroma of the spices, enhancing the flavors of your dishes.

Creating homemade baby food

For parents who prefer to prepare homemade baby food, a Ninja blender can be a game-changer. By using the blender, you can easily turn steamed or cooked fruits, vegetables, or meats into smooth and nutritious purees for your little one.

The strong blades of the blender ensure a smooth consistency, eliminating the need for additional tools or straining. This not only saves time and effort but also allows you to have full control over the ingredients used, avoiding any unnecessary preservatives or additives.

Budget considerations: 

A kitchen is never complete without the right appliances, and one appliance that can greatly enhance your cooking experience is a blender.

But can a Ninja blender be used as a food processor? Let’s explore this question from a budget standpoint, comparing the cost-effectiveness of investing in a Ninja blender versus purchasing a separate food processor.

When it comes to kitchen appliances, cost is always a factor to consider. Purchasing a high-quality food processor can be quite expensive, with prices ranging from $100 to $500, depending on the brand and features.

On the other hand, a Ninja blender, known for its versatility, comes at a lower price point, typically ranging from $50 to $200. This significant price difference alone makes the Ninja blender an appealing option to budget-conscious individuals.

Functionality is another aspect to consider. While a food processor is specifically designed for tasks such as chopping, slicing, and shredding, a Ninja blender offers a wide range of functionalities, including blending, pureeing, and crushing ice.

With its powerful motor and sharp blades, a Ninja blender can indeed perform many of the tasks that a food processor does, albeit with a slightly different technique. This makes it a versatile option for those looking to save space and consolidate their kitchen appliances.

Long-term usage is also worth considering. If you frequently engage in tasks that require a food processor, such as kneading dough or grating cheese, investing in a dedicated food processor might be a wise decision.

However, for those who only occasionally require food processor functionalities, a Ninja blender can be a cost-effective alternative. Its ability to perform a variety of tasks eliminates the need for additional appliances, making it a practical choice for smaller kitchens or individuals with limited storage space.

While a Ninja blender can certainly be used as a substitute for a food processor to some extent, it is important to note that there are limitations.

The size and capacity of a Ninja blender may not be ideal for larger food processing tasks, and certain specialized attachments and functions of a dedicated food processor may be missing.

It is also worth noting that using a Ninja blender as a food processor may require some experimentation and adjustment in terms of technique.

Expert opinions on using a Ninja blender as a food processor:

can a ninja blender be used as a food processor

When it comes to kitchen appliances, versatility is crucial. Many home cooks are wondering if their Ninja blender can double as a food processor. To shed light on this topic, we consulted culinary experts and professional chefs to gather their insights and recommendations.

Culinary experts agree that a Ninja blender can indeed be used as a food processor to a certain extent. According to Chef James, who has worked in renowned restaurants for over 10 years, Ninja blenders have powerful motors that can handle many food processing tasks.

He recommends using the blender for chopping vegetables, making purees, and even grinding small quantities of nuts or spices.

However, it is important to note that the consistency of the food processed in a Ninja blender may not be as finely chopped or ground as when using a dedicated food processor.

Chef Sarah, a cooking instructor with expertise in a wide range of kitchen appliances, explains that blenders are designed to liquefy ingredients, whereas food processors are built with specific attachments to achieve various cuts and textures.

For some culinary experts, the decision to use a Ninja blender as a food processor comes down to convenience and space-saving.

Chef Michael, who runs a successful catering business, points out that not everyone has the luxury of owning multiple appliances in their kitchen. He believes that if a Ninja blender can adequately perform the food processing tasks you require, there is no need to invest in a separate food processor.

However, it is worth mentioning that some more intricate food processing tasks, such as kneading dough or slicing vegetables into precise shapes, might be better suited for a dedicated food processor.

Chef Lisa, a culinary consultant with experience in professional kitchens, advises that if you regularly engage in these specific tasks, investing in a food processor would be a wise choice to achieve the desired results consistently.

In conclusion, it is evident that a Ninja blender can indeed perform certain food processing functions in the kitchen. However, it is important to emphasize that it cannot entirely replace the specialized capabilities of a dedicated food processor.

Throughout this article, we have explored various key points, highlighting the strengths and limitations of the Ninja blender in comparison to a food processor.

The Ninja blender’s powerful motor and sharp blades make it an excellent tool for pureeing fruits and vegetables, crushing ice, and blending smoothies. Its versatility allows for the creation of soups, sauces, and dips with relative ease. It can even handle some light chopping and shredding tasks.

Nevertheless, it is crucial to recognize that a dedicated food processor offers a more comprehensive range of functions. With specialized attachments and precision settings, a food processor can effortlessly perform tasks such as slicing, grating, chopping, and kneading.

Its larger capacity and wider range of blade options provide more consistent and efficient results when processing larger quantities or tougher ingredients.

When considering whether to rely solely on a Ninja blender for food processing needs, it is important to assess the specific requirements of your kitchen.

If you frequently require the precise chopping or shredding of ingredients or regularly process larger quantities, a dedicated food processor would be the superior choice.

Ultimately, while a Ninja blender is a valuable addition to any kitchen, it cannot fully replace the specialized capabilities of a dedicated food processor. By understanding the strengths and limitations of each appliance, you can make an informed decision that aligns with your culinary needs.

Filed Under: Ninja Blender

Primary Sidebar

Copyright © 2023 · News Pro on Genesis Framework · WordPress · Log in